
Guide #
List #
You can check the Business list in the figure below.
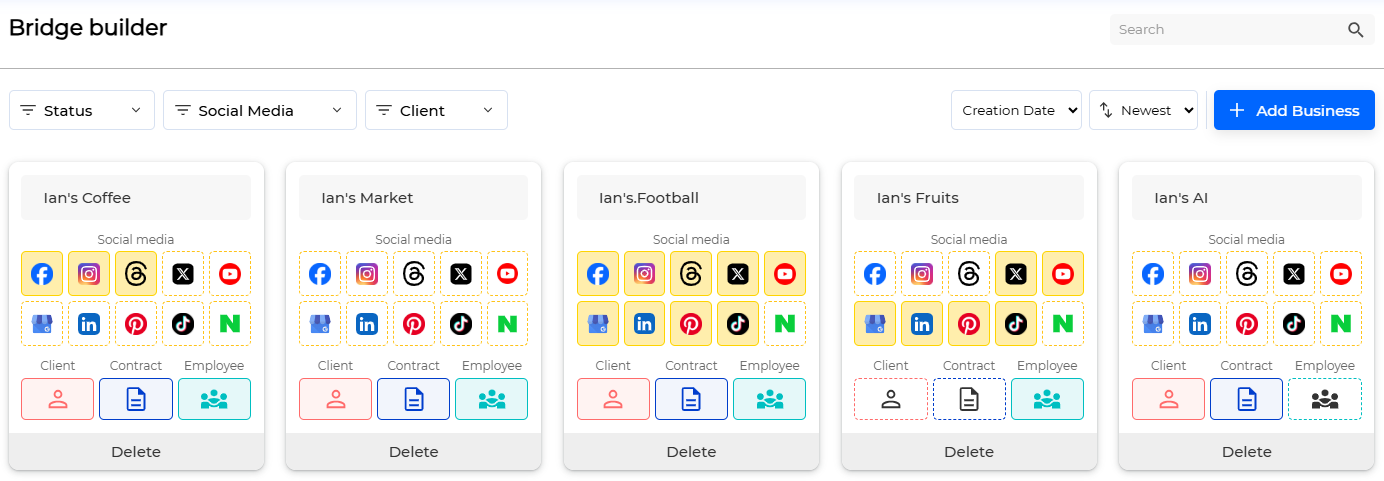
Elements connected to a business are displayed with filled colors.
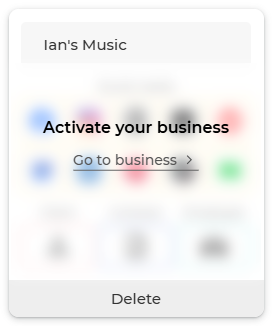
If the business status is deactivated, it is displayed as shown above and cannot be managed until it is activated.
Click the [ Go to business ] button to move to the Business Profile screen and change the status.
We provide filter and sort functions to efficiently manage list as follows:
- Filter: business status, social media, client
- Sort: creation date, name
Creation #
Here’s how to create a Business:
- Click the [ Add Business ] button.
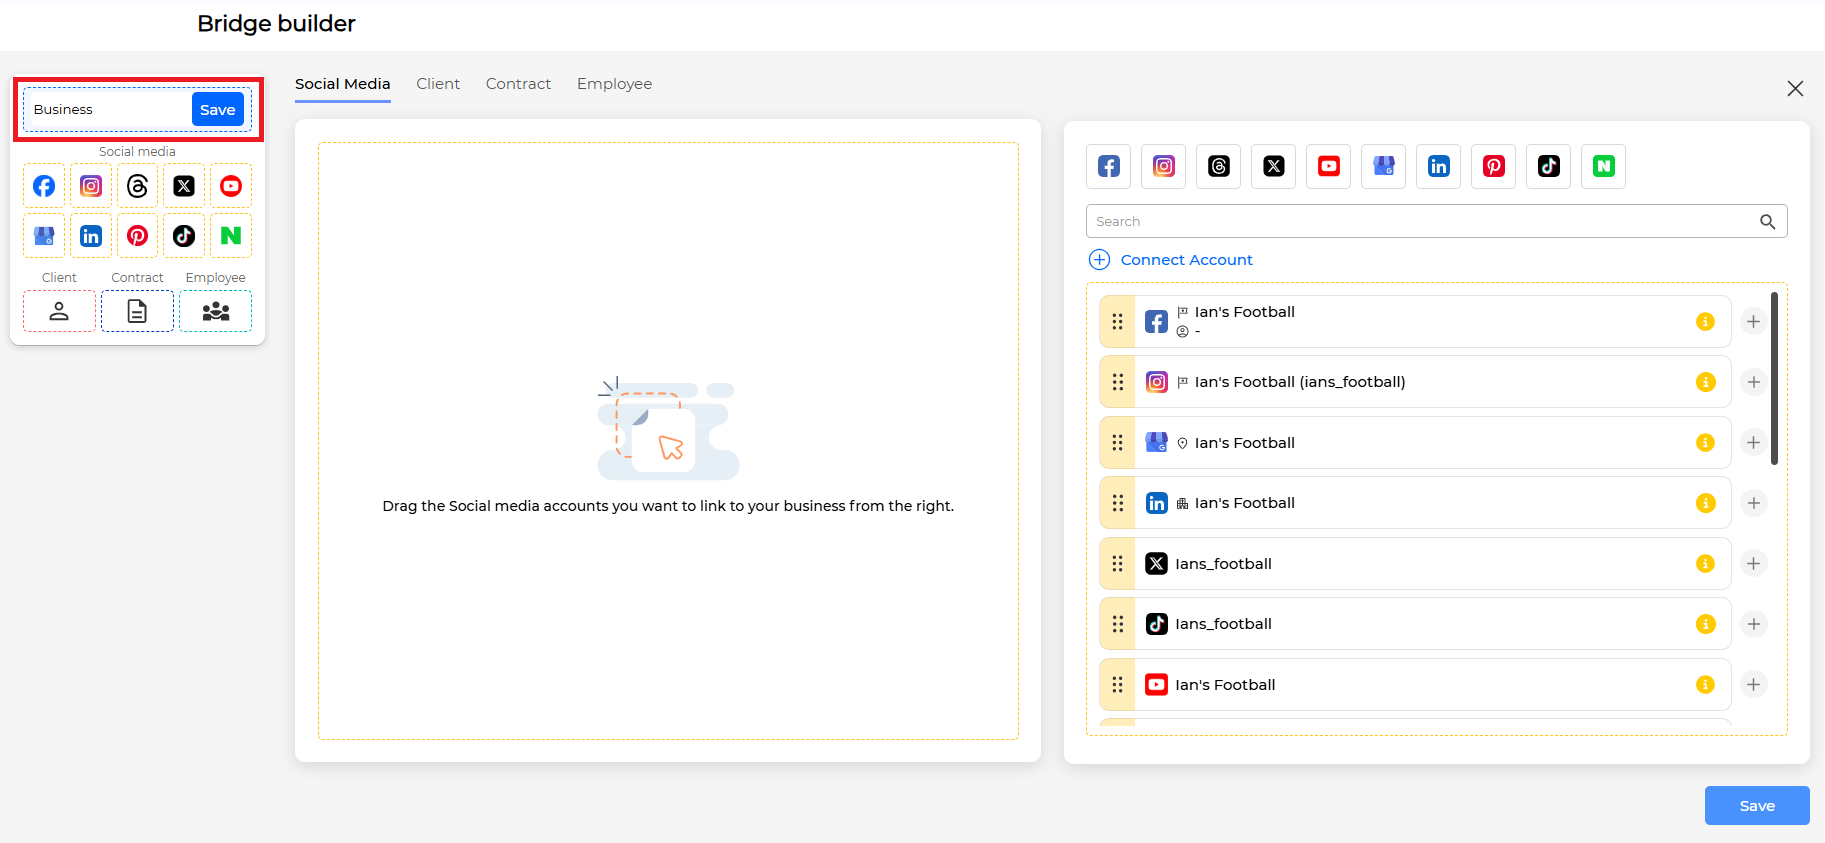
- When you move to the screen below, enter the Business name and click the [ Save ] button.
- Click the [ Save ] button in the lower right to complete the creation.
- (Optional) If there are elements you want to connect, check Connecting Business with Components.
Business Profile Management #
Click on the Business you want to manage in the list to move to the screen below.
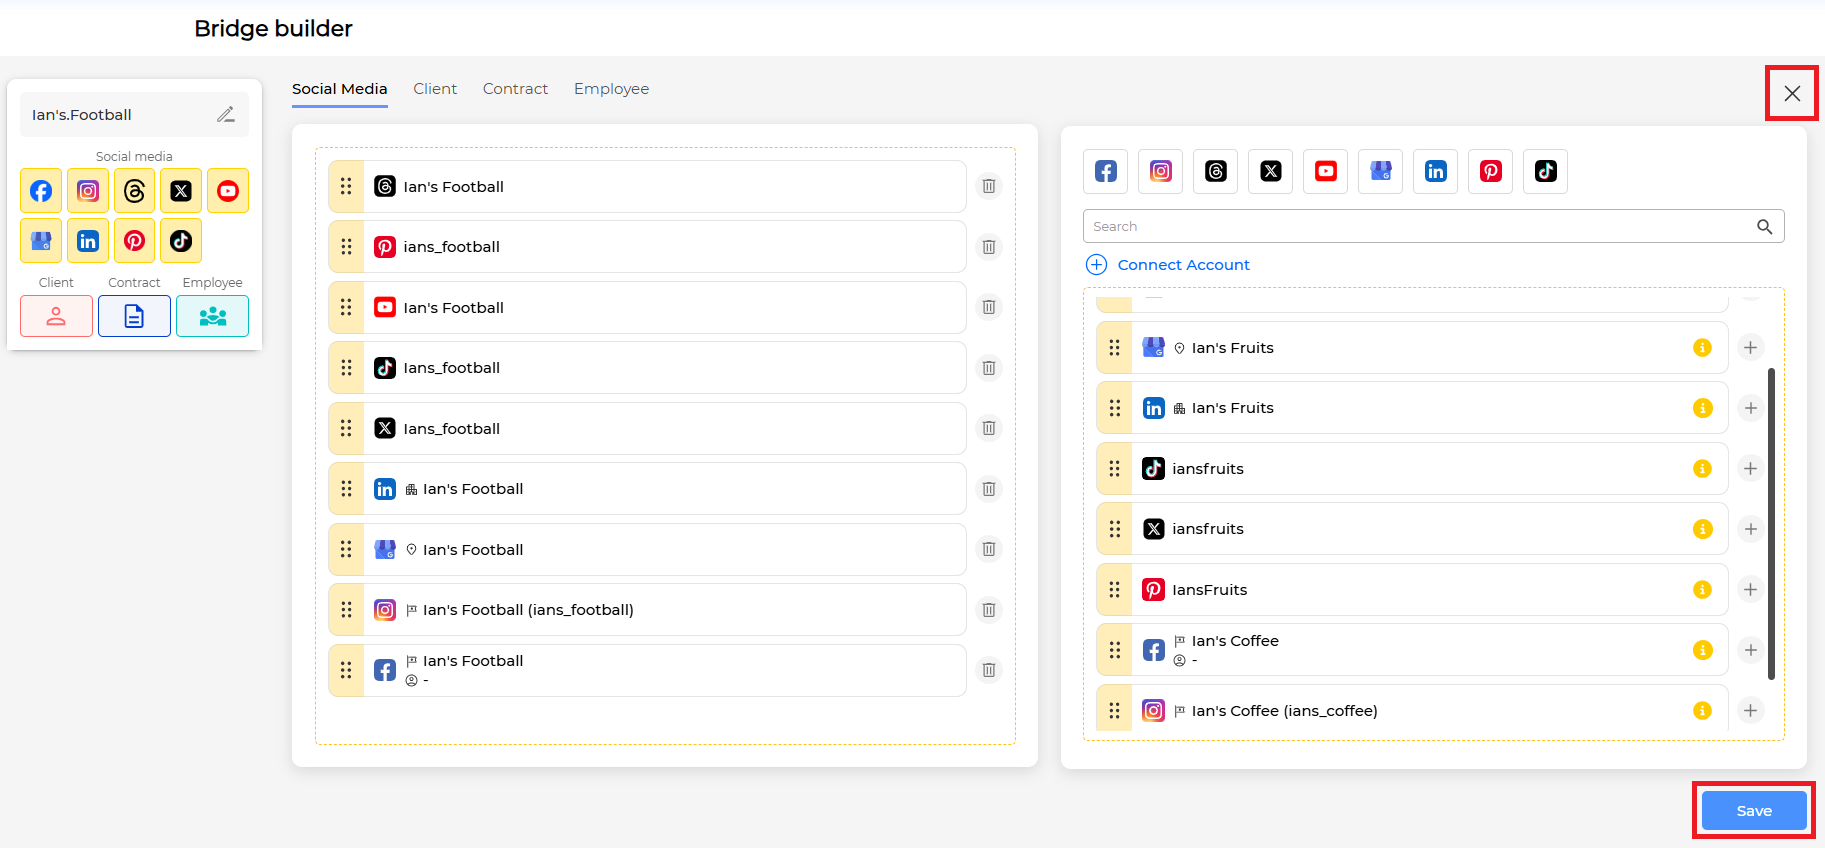
Click the [ X ] button to return to the list screen.
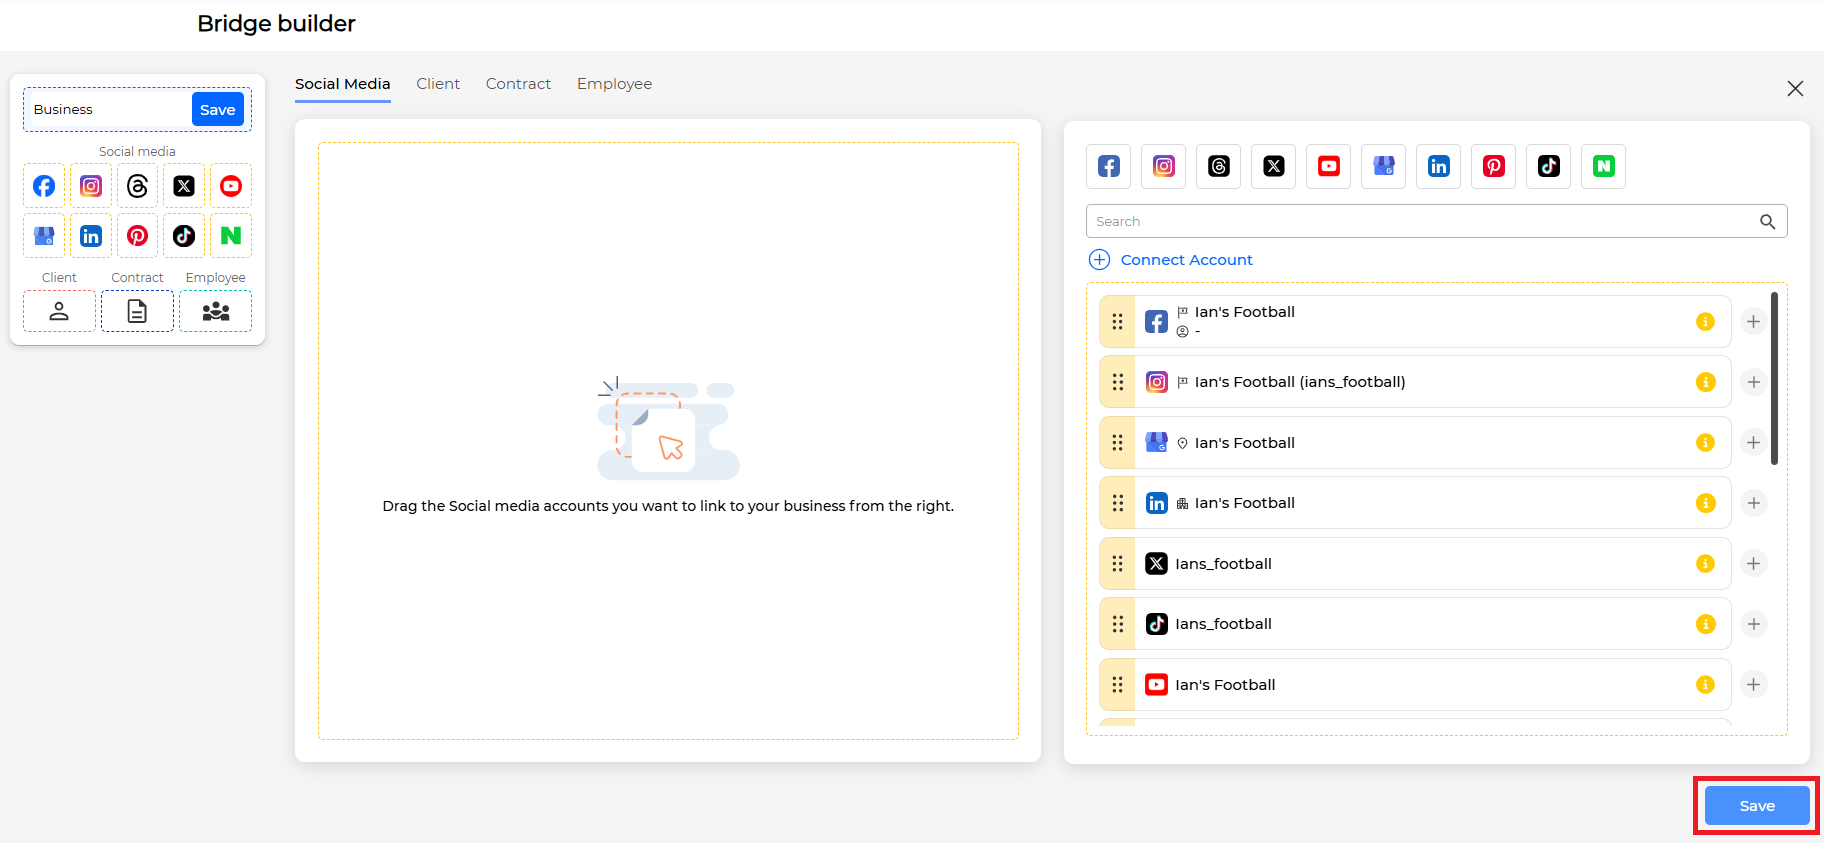
Modifications must be saved by clicking the [ Save ] button in the lower right corner.
The information you can manage is as follows.
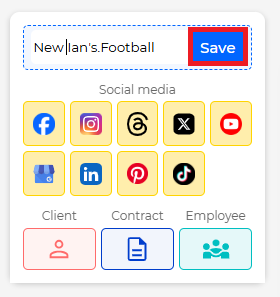
Change Business Name #
- Click the edit icon next to the Business name to change the name.
- Once the change is complete, click the [ Save ] button next to the Business name.
Connect Business with Components #
1. Connect Social Media Accounts #
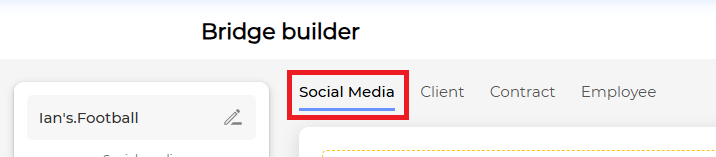
Click the Social Media tab.
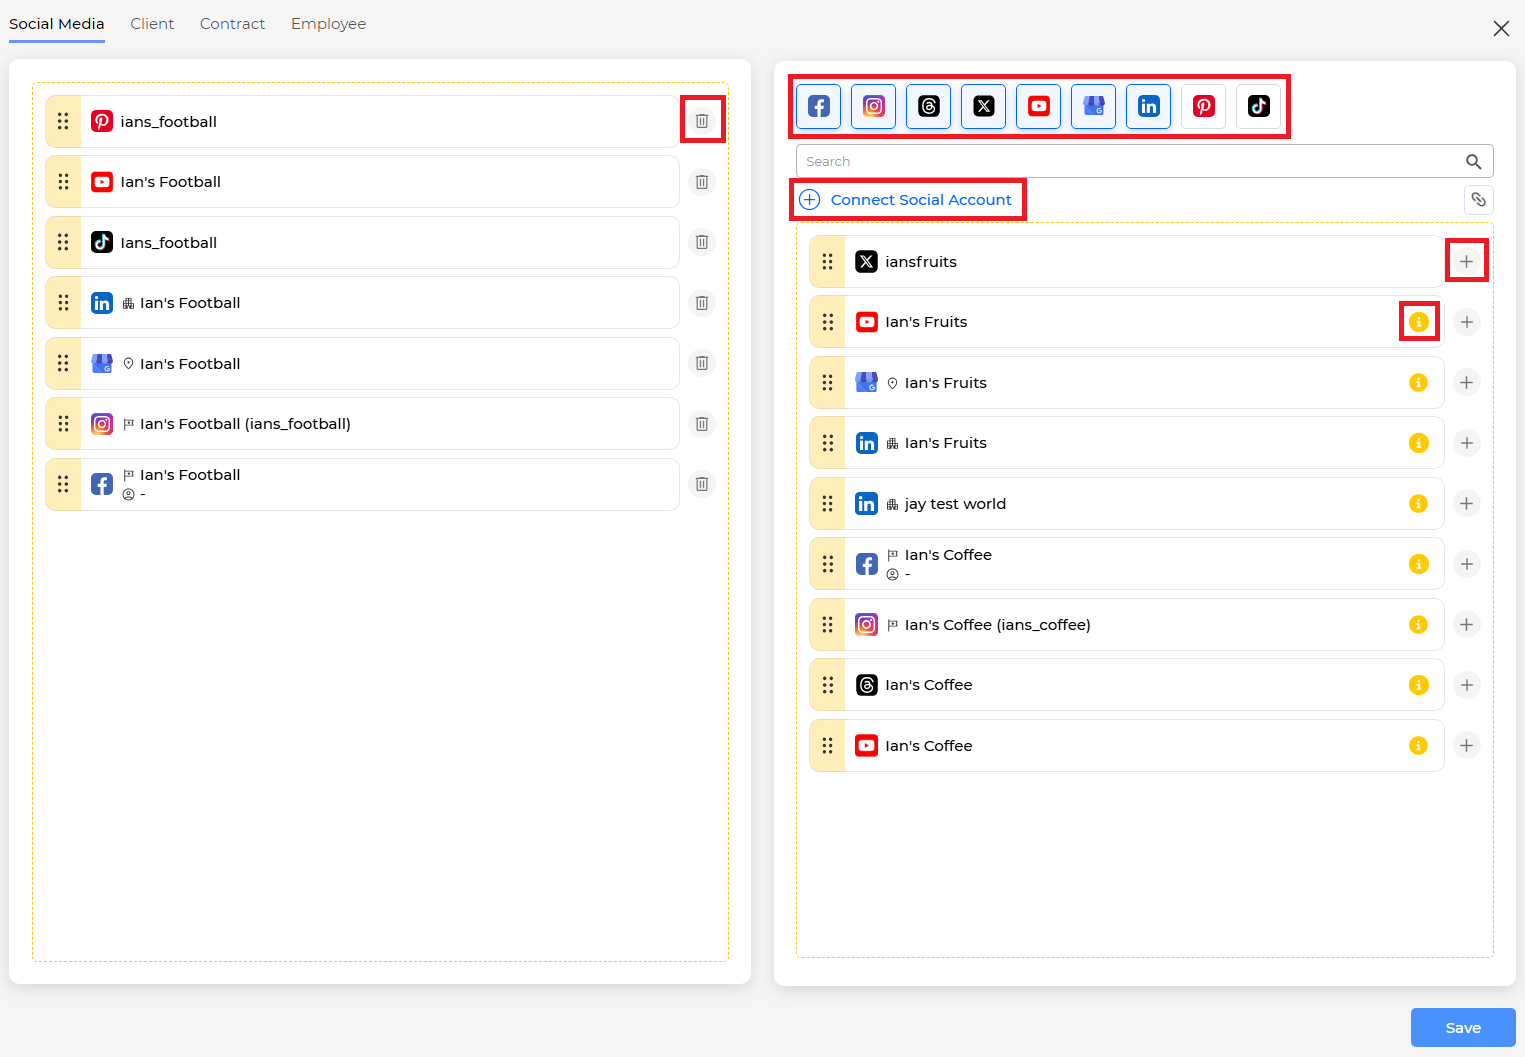
Left area: List of social media accounts currently connected to the business
Right area: List of social media accounts that can be connected to the business
- Clicking a social media icon allows you to view only the selected social media.
- You can add a social media account by clicking the [ Connect Social Account ] button. Learn more about adding a social media account
- You can connect/disconnect by drag-and-drop or clicking the add/trash icons.
- Social media accounts connected to other businesses display a yellow warning icon. Connecting will disconnect the account from the existing business.
Caution #
Only one account per social media platform can be connected to one business.
If a contract is assigned, the social media that can be connected is influenced by the Social Network of the contract.
2. Assign Customers #

Click the Client tab.
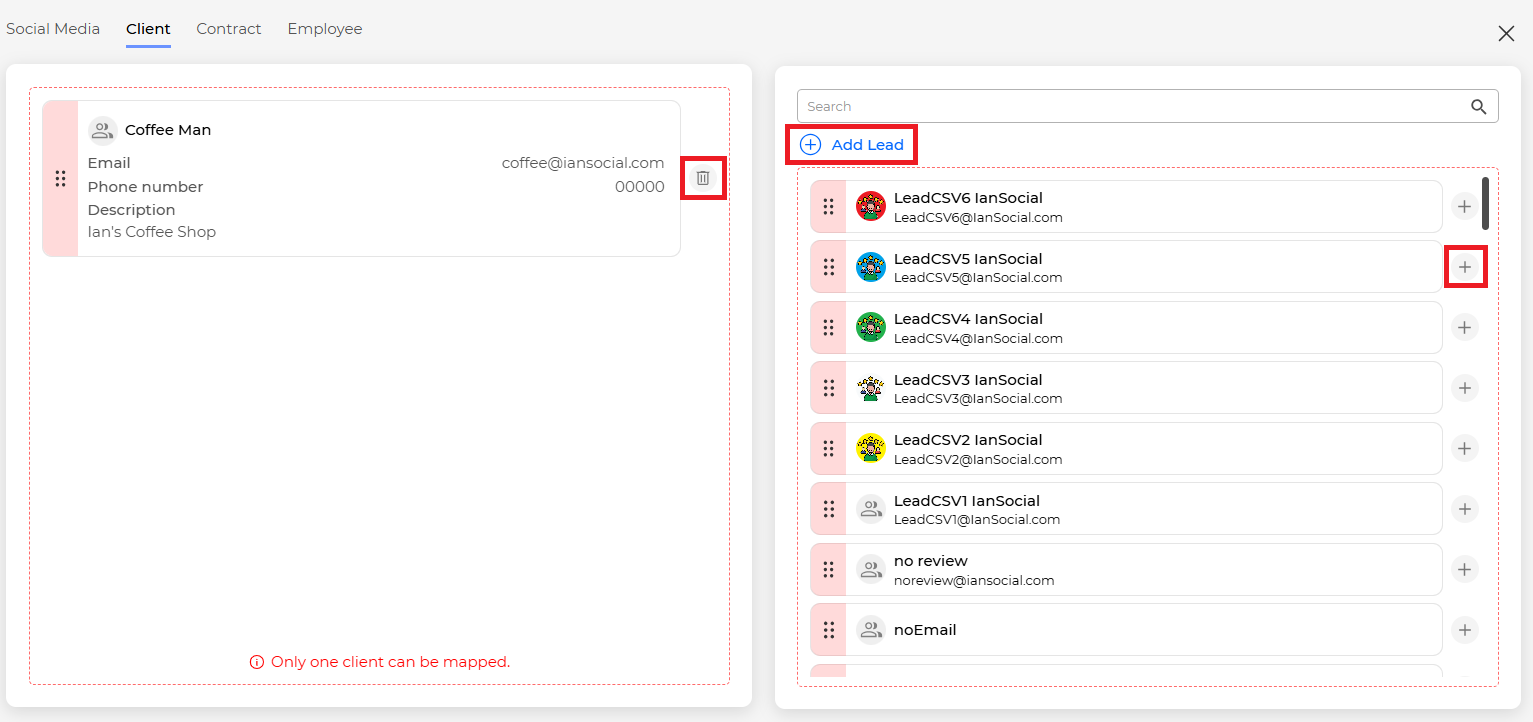
Left area: Customers or leads currently connected to the business
Right area: List of customers or leads that can be connected to the business
- You can add a lead by clicking the [ Add Lead ] button.
Learn more about creating a lead - You can connect/disconnect by drag-and-drop or clicking the add/trash icons.
Caution #
Only one customer can be connected to one business.
If the customer changes, and there are contracts assigned that the customer does not own, the contract assignment will be released.
3. Assign Contracts #

Click the Contract tab.
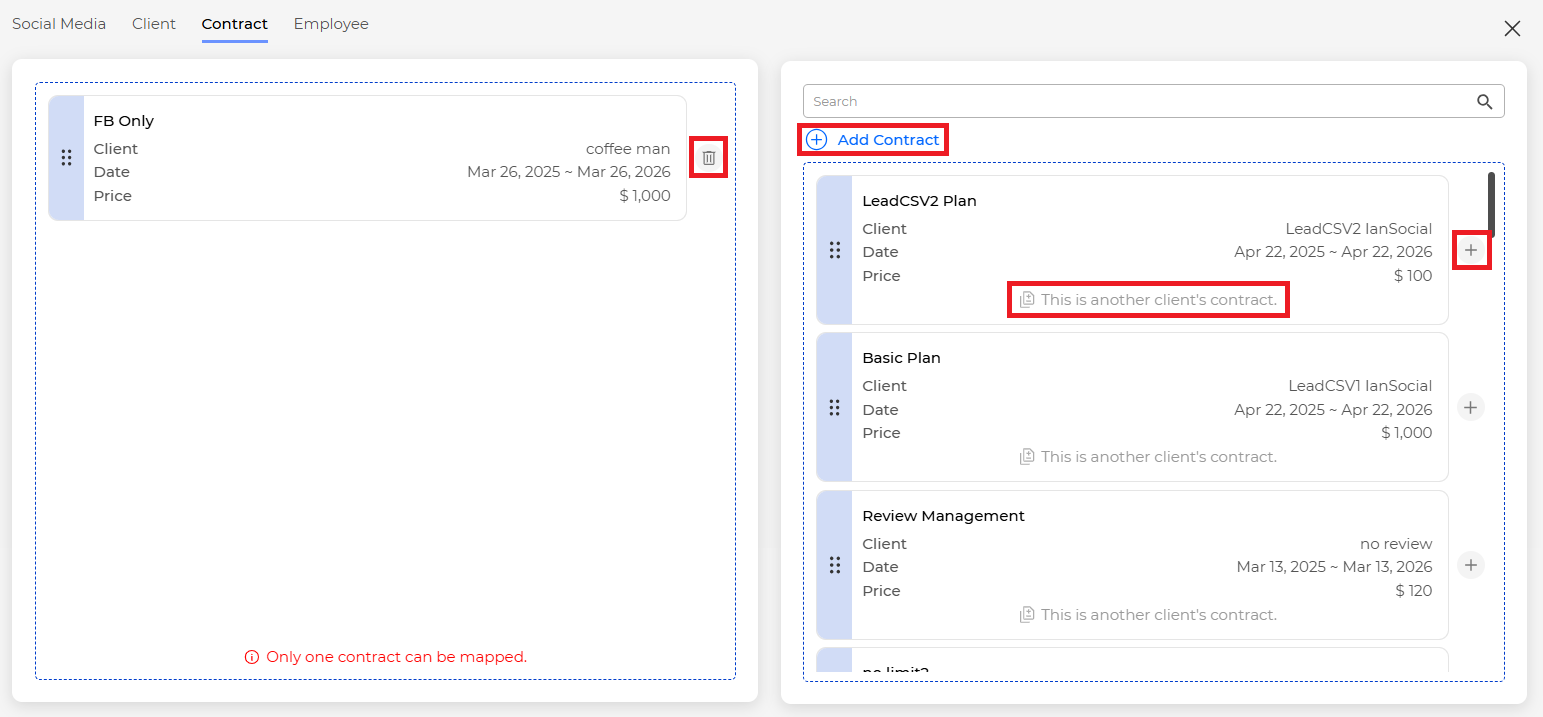
Left area: Contracts currently connected to the business
Right area: List of contracts that can be connected to the business
- Click the [ Add Contract ] button to add a contract.
Learn more about creating a contract - You can connect/disconnect by drag-and-drop or clicking the add/trash icons.
Caution #
Only one contract can be connected to one business.
If the contract changes, the customer assigned to the business will be designated as the customer in the contract.
If you designate a contract that is already connected to another business, it will affect the Number of Business count for the contract.
(If you need to connect multiple businesses to one contract)
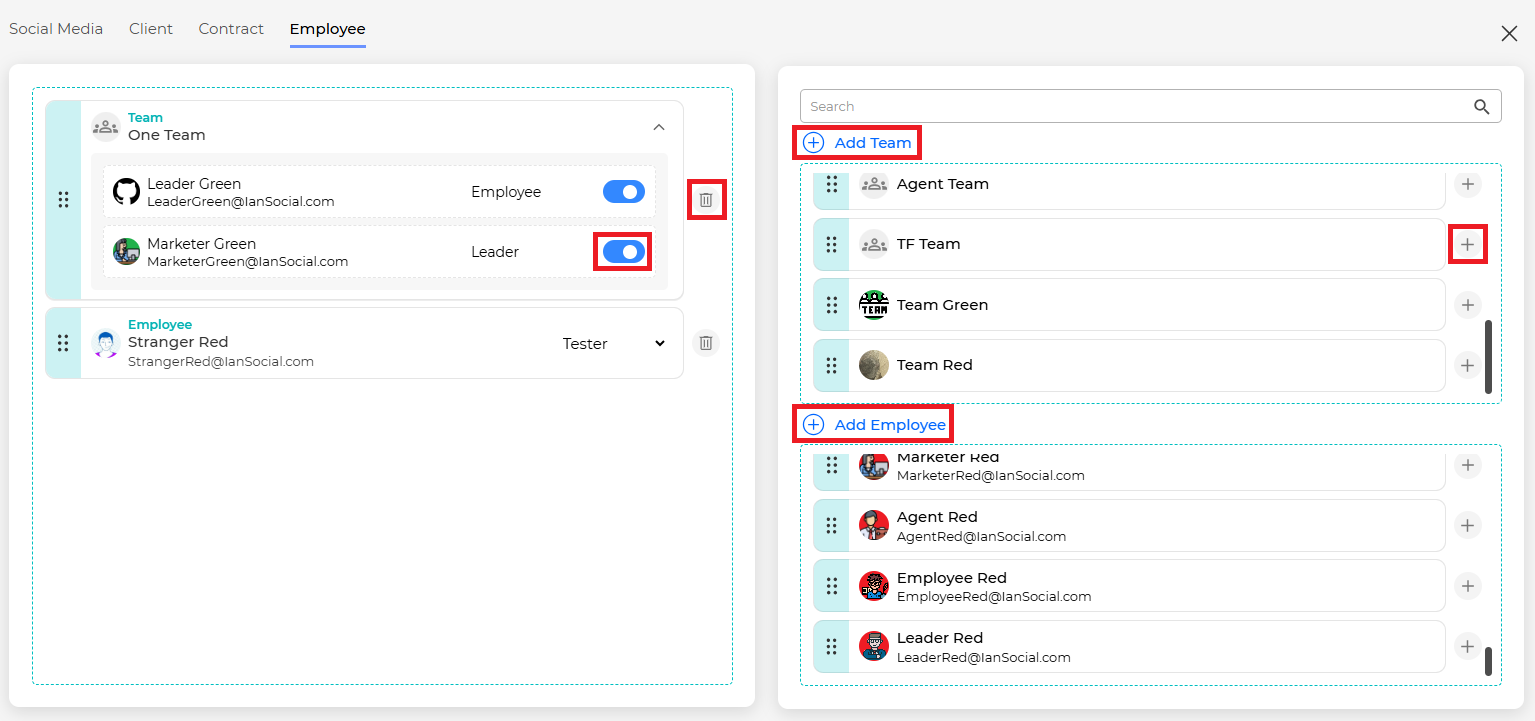
4. Assign Employees and Assign Roles #
 #
#
Click the Employee tab.
 #
#
Left area: List of teams and employees currently managing the business
Right area: List of teams and employees that can be designated as business managers
- Click the [ Add Team ] button to add a team.
Learn more about creating a team - Click the [ Add Employee ] button to add an employee.
Learn more about creating an employee - You can connect/disconnect by drag-and-drop or clicking the add/trash icons.
- When assigning a team, employees will manage the business with the authority they have in the team. Employees who belong to the team but should be excluded from business management can be designated/excluded by clicking the status management icon.
- When assigning employees, you must specify the permissions required to manage the business.
Caution #
If there are duplicate employees when adding a team or employee, that employee will be given the higher of the permissions they have been granted.
Deletion #
You can delete a business from the list screen by clicking the [ Delete ] button of the business you want to delete.